Electrical Outlets and Ground Fault Circuit Interupters(GFCI)
Electrical outlets are one of the easiest electrical devices to wire up.
Make sure power is turned off before you attempt to replace any electrical device.
Outlets
- First identify the ground, nuetral, and hot wires. Usually (in houses built after 1975) the ground will be insulated in green, or just be bare copper; the nuetral will be insulated in white, and the hot wire will be insulated in black.
- Next, you must strip out the wire 1/2 an inch to 3/4 of an inch long with a pair of strippers; then hook the ends so they can be wrapped around the screws on the side of the outlet. (Some outlets have holes on the back that let you push the stripped wire into rather than wrapping around the screw. These are not big enough to fit any wire larger than 14 guage, and i dont recommend it because it does not have as good of a connection.)
- Now wrap the hot (black) wire/wires around the brass screws, the nuetral (white) wire/wires around the silver screws and the ground (green or bare) wire/wires around the green screw.
- Finally, tighten the screws down tight on the outlet and screw outlet into the box in the wall.
Ground Fault Circuit Interupters (GFCI)
GFCIs wire up almost identically to outlets with just a few differences. These are found in several places around your house such as bathrooms, outside circuits, and in the kitchen.
- First identify the ground, nuetral, and hot wires. Usually (in houses built after 1975) the ground will be insulated in green, or just be bare copper; the nuetral will be insulated in white, and the hot wire will be insulated in black. Also identify which side is the line side and which side is the load side. The line side will be the wire coming from the electrical panel and the load side will be the wire going to the next consecutive pllugs in the circuit. (The GFCI will not work unless the line wire and load wire are identified properly.)
- Next, you must strip out the wire 1/2 an inch to 3/4 of an inch long with a pair of strippers. Bend the end of the ground wire into a hook so it will wrap around the ground screw.
- Now, hook the ground (green or bare) wire around the green screw and tighten it down, then push the nuetral, line wire into the line side silver screw of the GFCI and tighten it down; next push the hot, line wire into the line side brass screw slot and tighten it down. Do the same with the load side wires matching hot wires with brass screws and neutral wires with silver screws. (On GFCIs with only one set of wires coming into the box, only hook up to line side of outlet.)
- Finally, make sure all screws are tightend and screw GFCI into the box in the wall. Attach cover and youre done.
Problems and troubleshooting
-
There are too many wires to wrap around the two hot or nuetral screws, or the ground screw: This is a very easy fix. All you need to do is make a pigtail (diagram below). Just twist your wires of the same color, (all the hots or all the nuetrals) with the ends stripped out together. Then get another wire that is about 8 inches long, strip out one end of the wire and attach it to the wires that are twisted together in the box with a wire nut. Finally strip out the end of the wire and attach it to the plug.
-
The GFCI will not work: There may be a couple of things you can do to fix this. First check the reset button on the front of the GFCI, this may need to be reset in order for the outlet to work. If this is not the problem make sure the line and load wires are hooked up in the proper locations.
 | 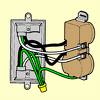 A ground pigtail |
 | 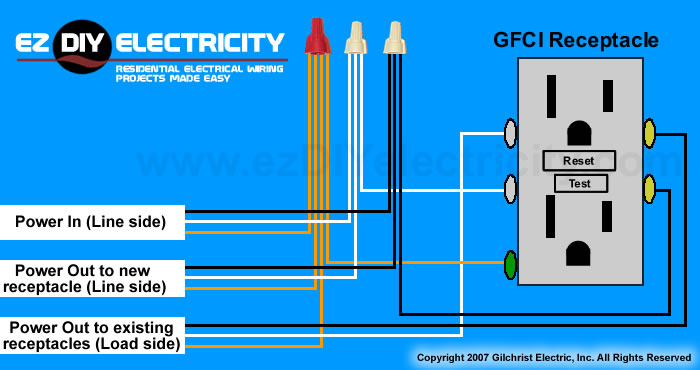 GFCI wiring diagram. |
